I have been taking my time putting it together, slowly assembling. I think in my old age(18) I’ve started becomeing more meticulous :p. Anyway, I am pretty much completed with the build. Over all goal were met. It is transportable, and very light. It should serve as a good hacking platform. It is going to be located in the WPI Collablab, which is the new on campus hackerspace a couple of freshman started. We might be doing weekly RepRap classes to get a few more in the space.
 |
| The hot end, from makergear. I ended up making a printed part to go below the wood to strengthen it. It was bending and pushing the insulator out of the groove. |
 |
| What 6 feet of nichrome looks like. |
 |
| Current is slightly higher than needed. (This is at 18v, running 35v on the printer) Seems to be ok on the printer so far, temp swing is positive 5C off target. |
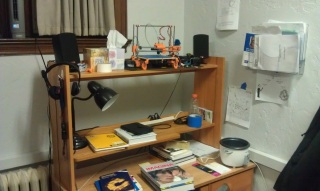 |
| Dorm Room RepRap FTW. When I had my Issac here it occupied half my lower desk space, which is massively inconvenient when I wanted to spread out to study. |
Overall issues to fix are the temperature swing(lower the duty cycle), get better X and Y steppers that don’t skip steps, and refine the bowden system. I ordered http://www.pololu.com/catalog/product/1209 which should have 25% more torque. They are back ordered, so I might be waiting a while. In the mean time I put the feet on blocks and added bigger fans and heatsinks to the motors, along with making the pulleys more heat friendly(http://www.thingiverse.com/thing:15566). I put the whole thing on a piece of MDF and zip tied everything down. It makes it really nice to transport. During printing I noticed that the extruder squirted plastic. The imperfections are hard to see in the prints because of the X and Y skipping steps. Once the motors get here I will try and fine tune the retraction or a get a smaller ID cable (I am using 4mm now). 35V seems to work well overall too. Props to whosawhatsis again. I am going to set this aside for a while until I get the new motors, and work on some other projects. Overall, with a bowden setup I feel this could be the hottest RepRap right now.


It's looking good! One question though: do you really mean 6 feet of NiChrome? (6 feet = 1.8288 meters !?) Perhaps you mean inches? On my setup I usually have ~30cm (~11 inches) which gives ~6 Ohms and that works fine with my 12v ATX supply.
LikeLike
For 35V I calculated it out to 51 ohms, where p=v^2/r. Knowing the length was a linear factor in resistance I divided by 6 ohms per ~30cm of nichrome(stated on MakerGear's website). I used 31awg instead of 30awg, and I really needed ~2.4m, but I didn't have that long of a continuous piece.
LikeLike
Just yesterday I was asking on the IRC about a bowden setup for a Printrbot and the general advice was strongly against (both) Bowden and Printrbot :-(I thought that a bowden would make sense so all four motors can stay in the printer base and only x-axis motor would be mobile. Not having previous experience with a bowden I am not sure what to expect.
LikeLike